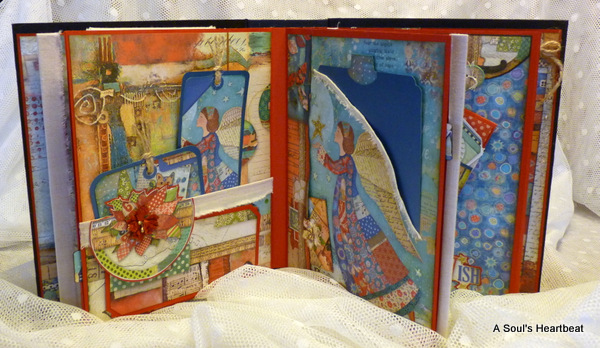
First off let me say I love Stamperia's Make a Wish paper collection, the images are amazing and the paper gives you so many opportunities to create with it. Here I've made an 8"x10" mini with 5 interactive pages, flips, flaps, pockets, tuck ins, etc. etc. ect. I used Crafty City's Make a Wish Kit to create my mini.
Note - This mini is created using an additional pad of 10 sheets of the Stamperia paper collection. With that being said you could always get the kit and add your own stash of complementary Holiday paper, prints or solids to expand what's available in the kit.
 The cover of the mini highlights the resin frame that came in the kit along with the velvet leaves and poinsettia flowers. I fussy cut the angel and popped her up on a gold foil doily that I'd cut from my Cricut. I detached her wing, popped it up and added the gold lace behind before placing it under her and over the frame. I don't always add a lot of frills to the outsides of my minis but I love the how your eye pulls directly to the angel and that's the first thing you see.
The inside front cover and page one. Page one has been divided into four sections each with a pull out photo mat behind the gorgeous images on the paper.
Page one is a tri-fold which attaches to the page above (the four divided photo spots). I have used torn muslin fabric to act as the hinge to hold the pages together. This provides a very flexible page construction.
The tri-fold folded and the facing page two.
The inside of page two, with a large flip up, tuck in pockets and tags.
The back of page three has a large pull out bifold to house up to 5"x7" photos. The front of page four (another tri-folded with muslin hinges) has been left free to place your photos wherever you choose over the paper images.
Here is the front of the second tri-fold
And the inside of the tri-fold with a large slip in pocket
The folded tri-fold on the left and the expandable photo mats on the right.
The back of page five and the inside back cover
Hidden inside page five is a magnetized photo op to hold four framed pictures.
Inside of page five (the frame surprise backs the right side in this photo)
Thank you everyone for sharing your time with me. I hope you like my new mini and hope you'll pop over to the video walk through where you'll really be able to get the jist of this new construction. I'll also be uploading a video tutorial series to share how to put it together.
Find A Soul's Heartbeat at


